


 |
High Sensitivity Water Level Sensor Module For Arduino AVR ARM STM32 ST Depth of Detection
Product Details:
| Brand Name: | UCHI |
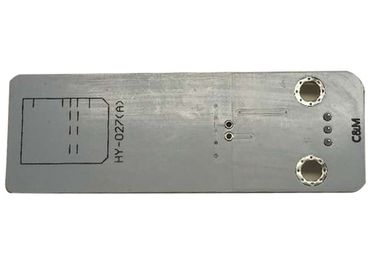
| Model Number: | HY-027(A) |
Payment & Shipping Terms:
| Minimum Order Quantity: | 1000 PCS |
|---|---|
| Price: | Negotiable |
| Packaging Details: | Bulk |
| Delivery Time: | 2 Weeks |
| Payment Terms: | T/T |
| Supply Ability: | 1,000,000 PCS/Month |
|
Detail Information |
|||
| Product Name: | Water Level Sensor | Power: | +3.0V -5.5V |
|---|---|---|---|
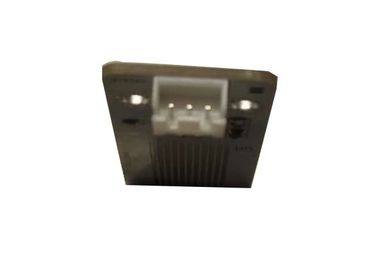
| Signal Type: | Analog Signal | Connector: | XH2.54 × 3 |
| Pin: | S-Signal,V-Power,G-Ground | Working Voltage: | DC5V |
| Work Current: | Less Than 35mA | Working Moisture: | 10%-90% Without Condensation |
| Highlight: | thermocouple temperature sensor,ntc probe temperature sensor |
||
Product Description
High Sensitivity Water Level Sensor Module For Arduino AVR ARM STM32 ST Depth of Detection
Quick details
Operating voltage: DC 3-5V, < 20mA
Applications :Rainfall detecting,Liquid leakage,Tank overflow detector
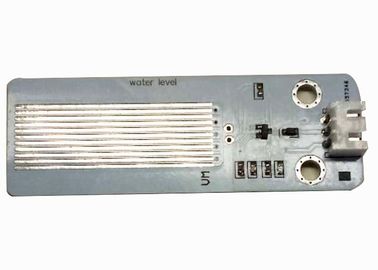
Judge the water level through with a series of exposed parallel wires stitch to measure the water droplet/water size .
![]()
Introduction
This module with small size and high cost-effective is easy to use.In this article, we will use the digital storage oscilloscope to show you how the output voltage change with the immersion depth.What's more,we will show you an interesting actual application case.You will have a clear idea of how this module to realize the function of water level alarm.
This module is designed mainly for the DIY hobbyist and provide them a low-cost and easy-to-use water level detection scheme.The stability and durability of this module can not reach the industrial standard.But we use the high-quality PCB board to improve its stability and durability.If you just want to DIY for fun, this module will be a good choice.
Features: Simple ,Easy to use,Small size,Light, High Cost-Effective
Applicable Occasion:Water level alarm design
Parameters
Name:Water Level Sensor
Power:+3.0V -5.5V
Signal Type:Analog signal
Connector: XH2.54 × 3
Pin :S-Signal,V-Power,G-Ground
Instructions for use: The water level can be known by judging the output bit analog quantity.
Functional Introduction:
Functional Test
- Testing environment:barreled pure water
- Testing procedures:
- Connect the module to 5V power supply
- Put the module to into the pure water
- Observe the connection depth between the immersion depth and the output voltage of AO end.
Actual testing results
Actual application case
Use this water level sensor module to control on or off about the LED which is on the arduino board
Tools:
- arduino uno
- Pin Header
- Dupont Cable
When the immersion depth of the module does not reach the setting value,LED on P13 of arduino board is not bright.
How to use a water level sensor module with Arduino
Continuing with sensors that can be used in aquaponics, hydroponics systems or automatic outdoor plant care, we will explain how to use a water level sensor to control the amount of water we have in a tank. The same sensor can also be used to detect if it is raining.
Specifications
This sensor is supplied to 5V or 3.3V on VCC and GND pins. The pin S will give us an analog value between VCC and GND. So we will use the S pin as analog input connecting Arduino, the value read will be higher depending on the sensor surface is covered with water. This is because the water acts as a conductor, given that the water we use in our deposits not be pure water (H2O), since if water is nonconductive. But rarely we will use this type of sensors to measure the water level in a tank of pure water.
| Power supply | 3,3V ~ 5V |
| Current | < 20mA |
| Humidity sensitivity range | 10% ~ 90% |
| Pinout | +: VCC -: GND S: Analog output |
Use as a level in a tank
To use it as level detector in a deposit have to install the sensor on the inside of the tank at the level where we want to control the water level. The sensor must be positioned so that parallel lines are perpendicular to the sensor water level. The pin S will give us a greater value as the sensor is immersed.
Use as rain detector
To detect whether it is raining with this sensor have to position it horizontally so that rain falling on the sensor, as raindrops fall on the sensor film of water on the surface will be formed by increasing the value of the pin S, this how we can deduce if it is raining.
Code
In both cases we can use the same code, because it simply will be responsible for reading the analog value of S. pin up to us to interpret the measures we are taking.
|
1
2
3
4
5
6
7
8
9
10
11
12
13
14
15
16
17
|
const int analogInPin = A0; int sensorValue = 0;void setup() {Serial.begin(9600); }void loop() {sensorValue = analogRead(analogInPin); Serial.print("Sensor = " ); Serial.print(sensorValue*100/1024); Serial.println("%");delay(1000); } |
Notice
(1) did not carefully read the instructions before you do not give the driver board is powered !
Avoid faulty wiring caused permanent damage to the drive plate .
(2 )Please carefully check pin function , attention condensed identifier , correct wiring ! Do not
reverse the power cord , resulting in electronic devices burned.